NEW STORAGE / BACKUP SOLUTION
INTRO
A lot of people don’t know that I spent a little more than 15 years of my life as a network engineer working on routers, switches, and servers which came in very handy once I became a full-time photographer. Just like most photographers starting out, I stored all of my photos on a single external hard drive for the first couple of years. Once weddings started picking up and we moved into our first studio, I knew it was time to invest in a better storage system. One that would be much more reliable and allow for multiple backups so that the day would never come where I had to tell my client that I lost their photos due to a hard drive crash.
Even though I had worked in the network field for as long as I did I wasn’t very familiar with storage and all the devices that were out there. So, it was just as confusing to me at first as it is to the majority of photographers/creatives out there who are looking to upgrade for the first time. The good thing is, you don’t have to have any real network knowledge to move from a single external hard drive to a more fail-safe setup that allows for multiple points of failure. It was only when I needed to upgrade to a much larger setup that included remote access that my network background came in handy which I’ll get to later. For now, let me show you my current storage setup as well as explain some of the terminologies and acronyms (RAID, SSD, HDD) that will help you decide what is the best route to take when upgrading your storage system to something more robust.
*SKIP TO THE BOTTOM FOR UPDATES*

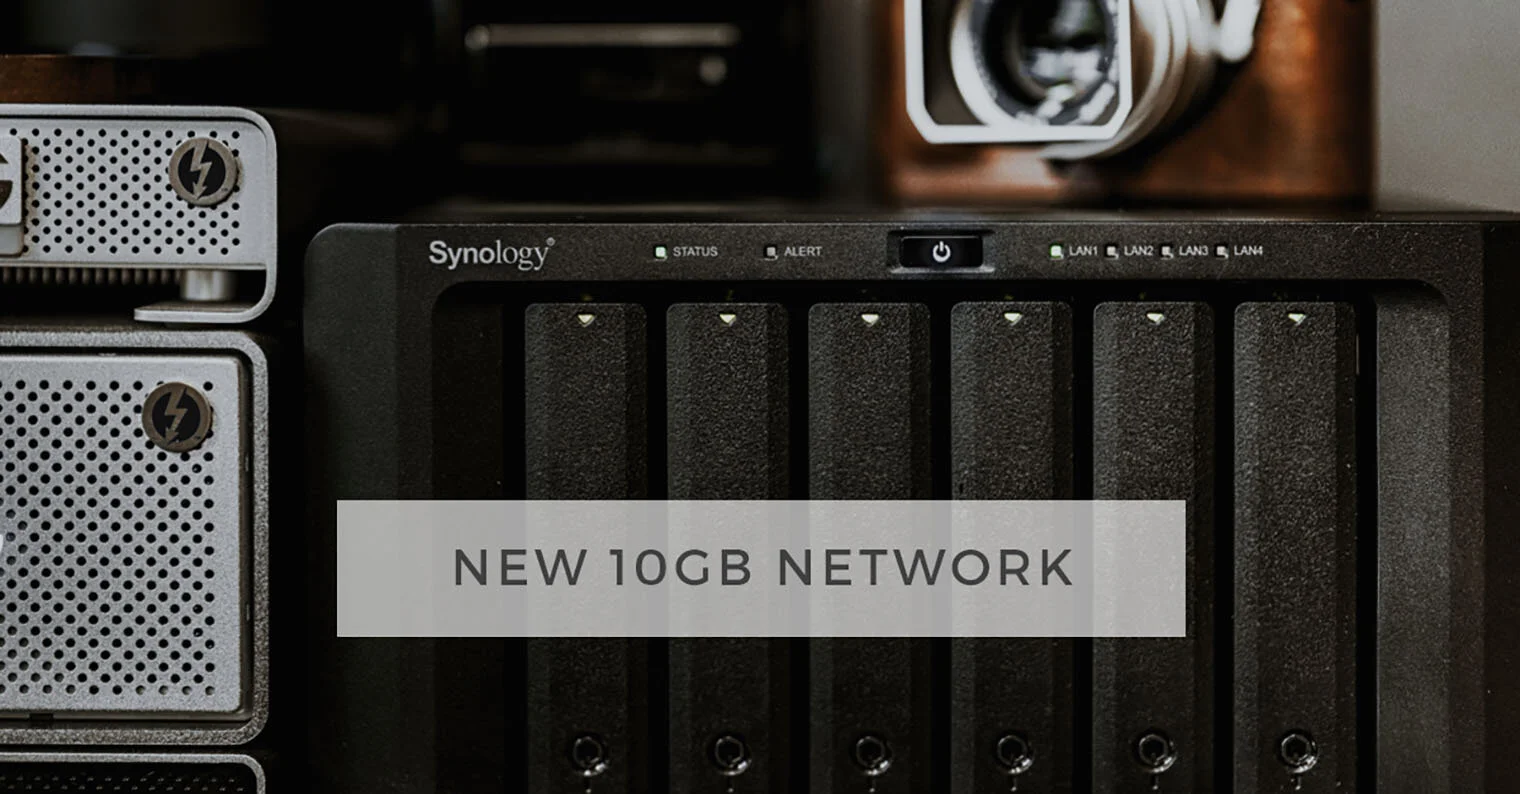
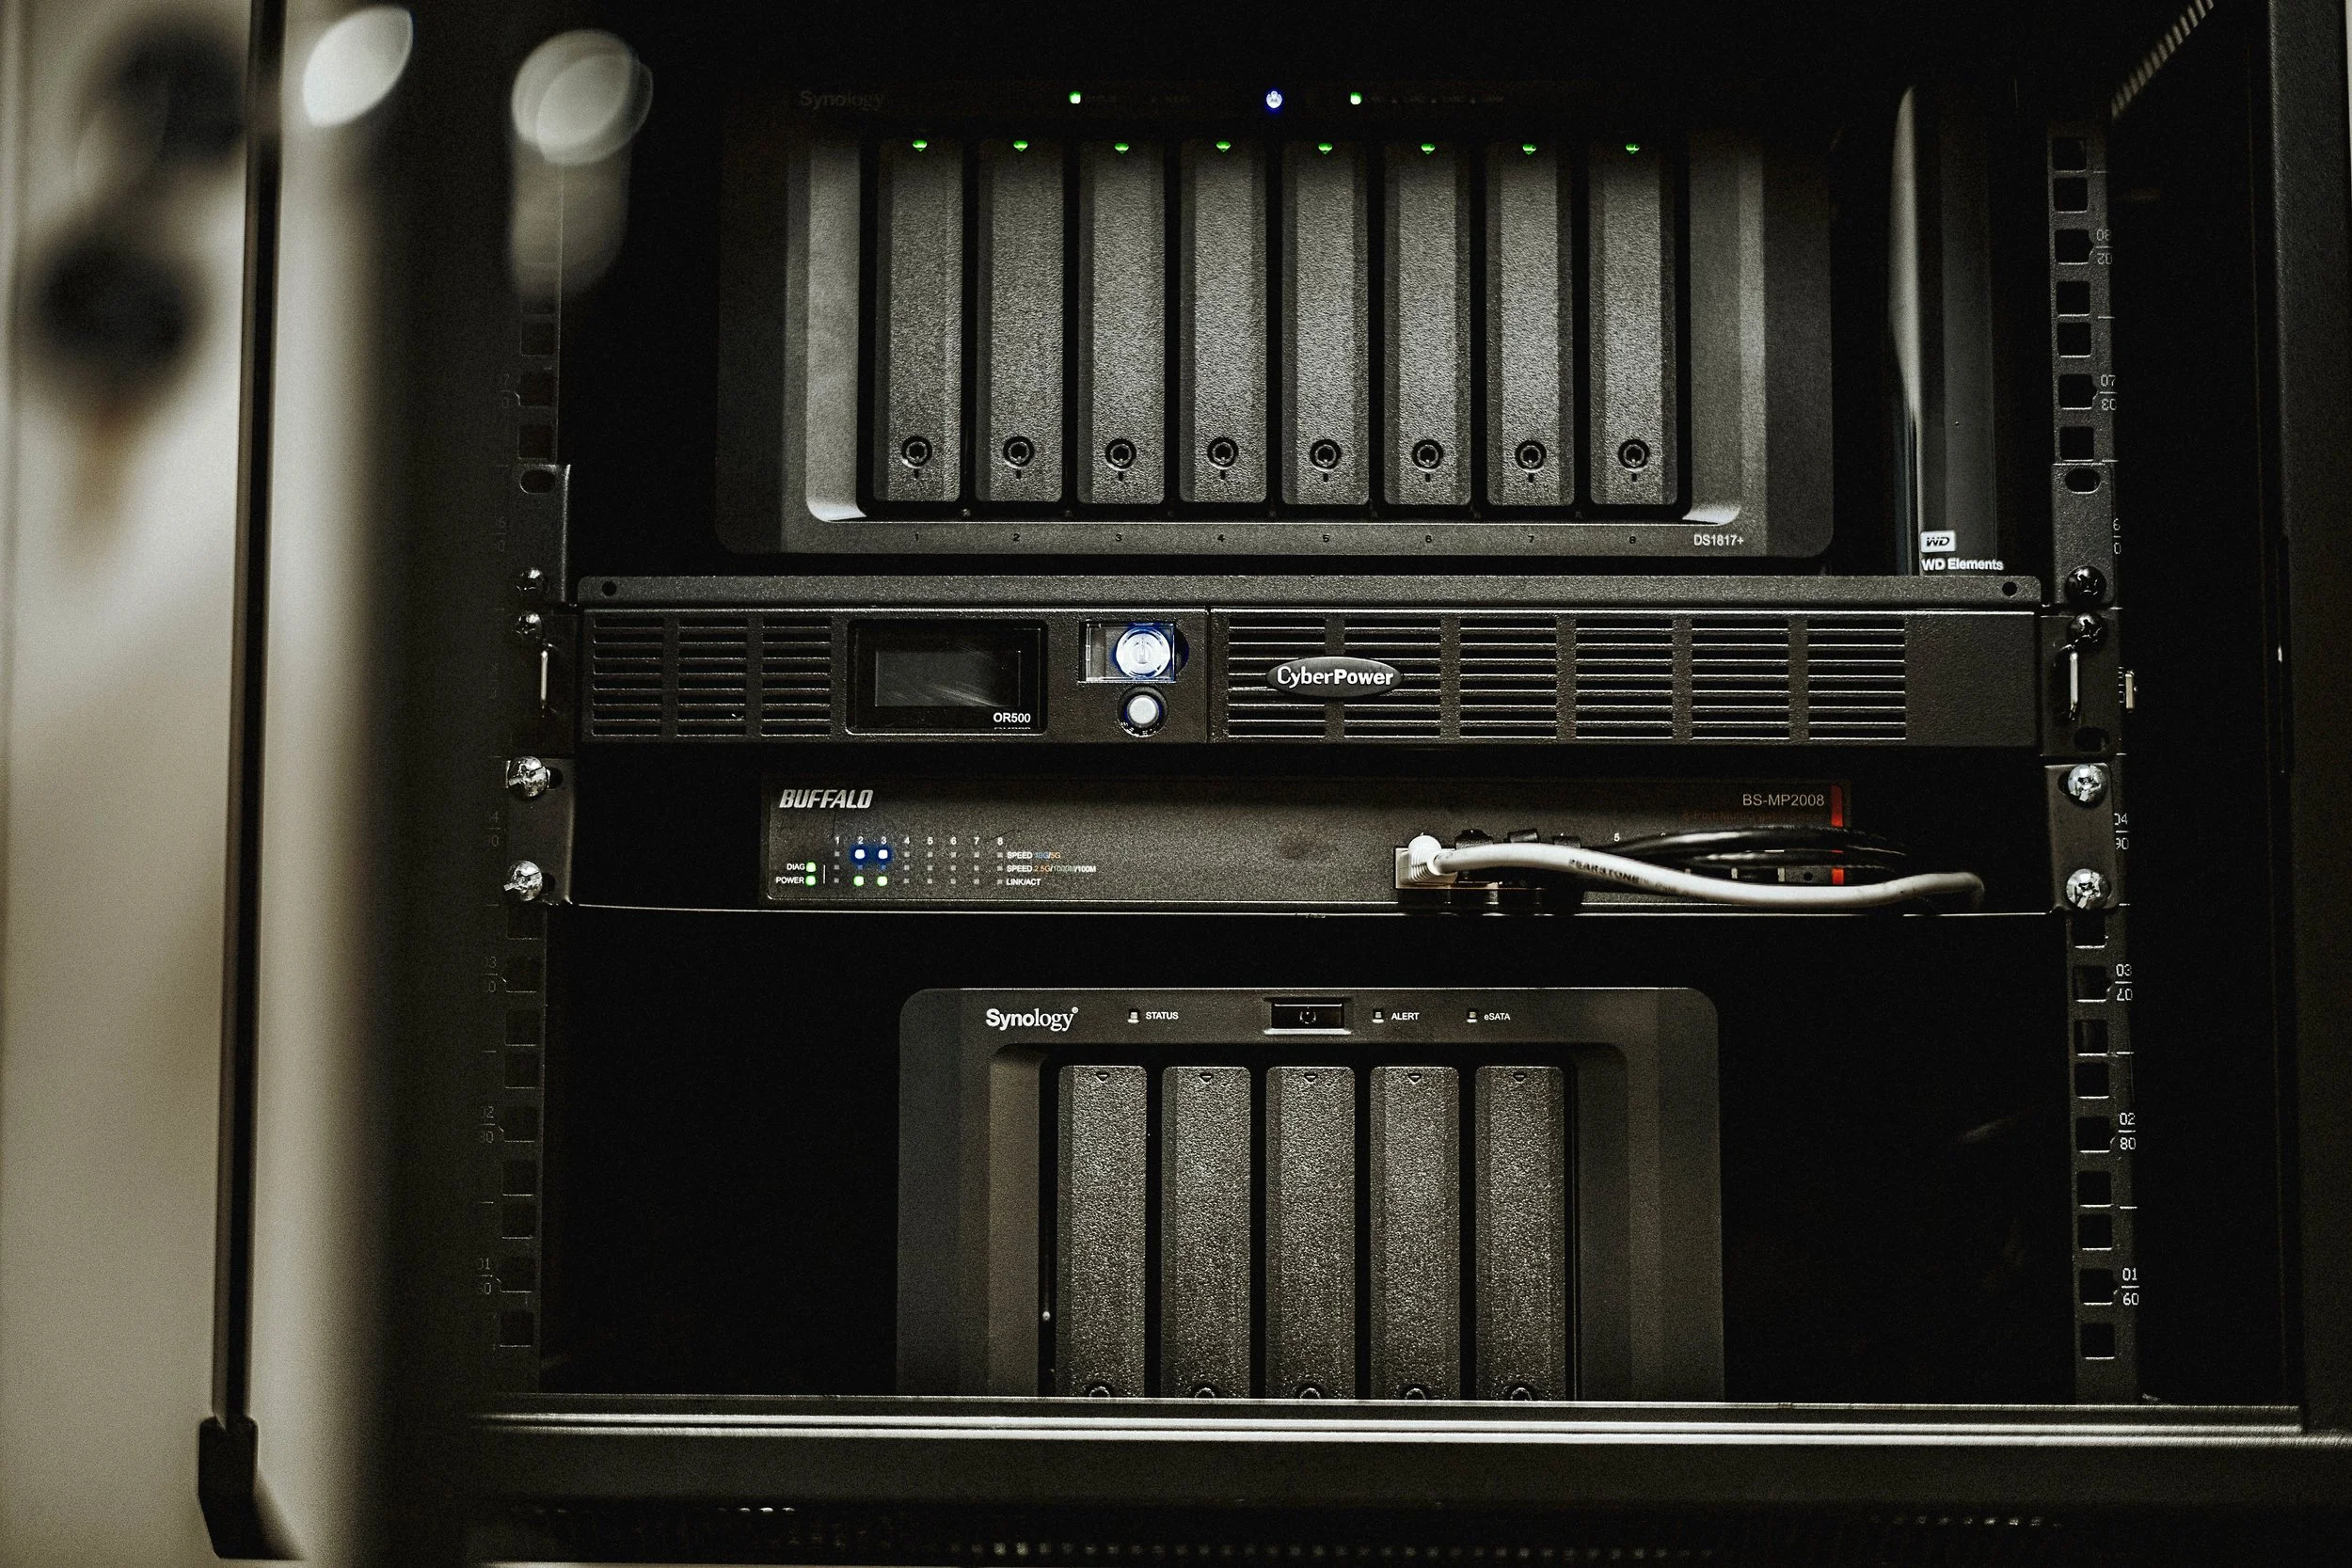
Along with the complete remodel of the new studio space, I also installed a completely new network with upgraded storage equipment. The key piece of the new setup is the Synology DS1817+ 8-Bay NAS with the optional 10Gbe Ethernet card installed. I just finished working out all of the kinks (there were definitely a few along the way) and finally have it to running exactly how it should be. If any of that confused you, don't quit on me yet. I promise to break things down a little better for those who aren't quite as fluid with network/storage jargon. For those of you who are, these are the speeds I'm getting while transferring files from two different workstations in the new studio. If this doesn't peek your interest, I don't know what will.

WHY
Basically, and without too much of a backstory, I needed to invest in a larger storage/backup solution with Twisted Oaks Studio continuing to grow like it has. This new setup not only provides a lot more storage and speed but will also allow for a lot more growth over the next few years. I've spent the past year or more researching and preparing for this upgrade knowing that it was inevitably coming. My current setup wasn't going to cut it that much longer.
The trouble is that there's a shit ton of options and decisions to make when upgrading to a larger storage setup like this one. The amount of time spent researching this move was a must in order to get the best setup possible. Even though the majority of photographers/videographers reading this would be perfectly fine with the setup that I had previous to this, there are a lot of you out there who could benefit from investing in a NAS like the one I installed. I wish that I had made the investment and had this setup running long before now. Especially when it comes to the 10Gbe speeds I'm getting now, which I'll get into with this article. Not only how to get it, but why I personally need it now. It isn't just to stroke the ego, I promise.

THE BASICS
My previous storage setup, the one I wrote about for SLR Lounge in 2016, was absolutely perfect for storing and backing up the 35-40 weddings that my wife and I shot in 2015-16. If you don't quite understand what makes up a solid backup solution and are currently storing all of your work on a single hard drive, PLEASE read that article first. That's a setup that I've helped many photographers implement over the past couple years making it possible for them to sleep much better at night.
In 2017, Twisted Oaks Studio shot over 125 weddings. With 2018 in full swing and moving into a new studio space, I decided it was time for an upgrade. Not because I simply wanted to spend more money that I don't have, but because it was the smart thing to do right now. I made the move to a much larger setup that can store and backup all the files for the entire "studio". In other words, rather than just storing and backing up my personal Twisted Oaks files, I'm now doing the same for the entire studio made up of 7 lead photographers.
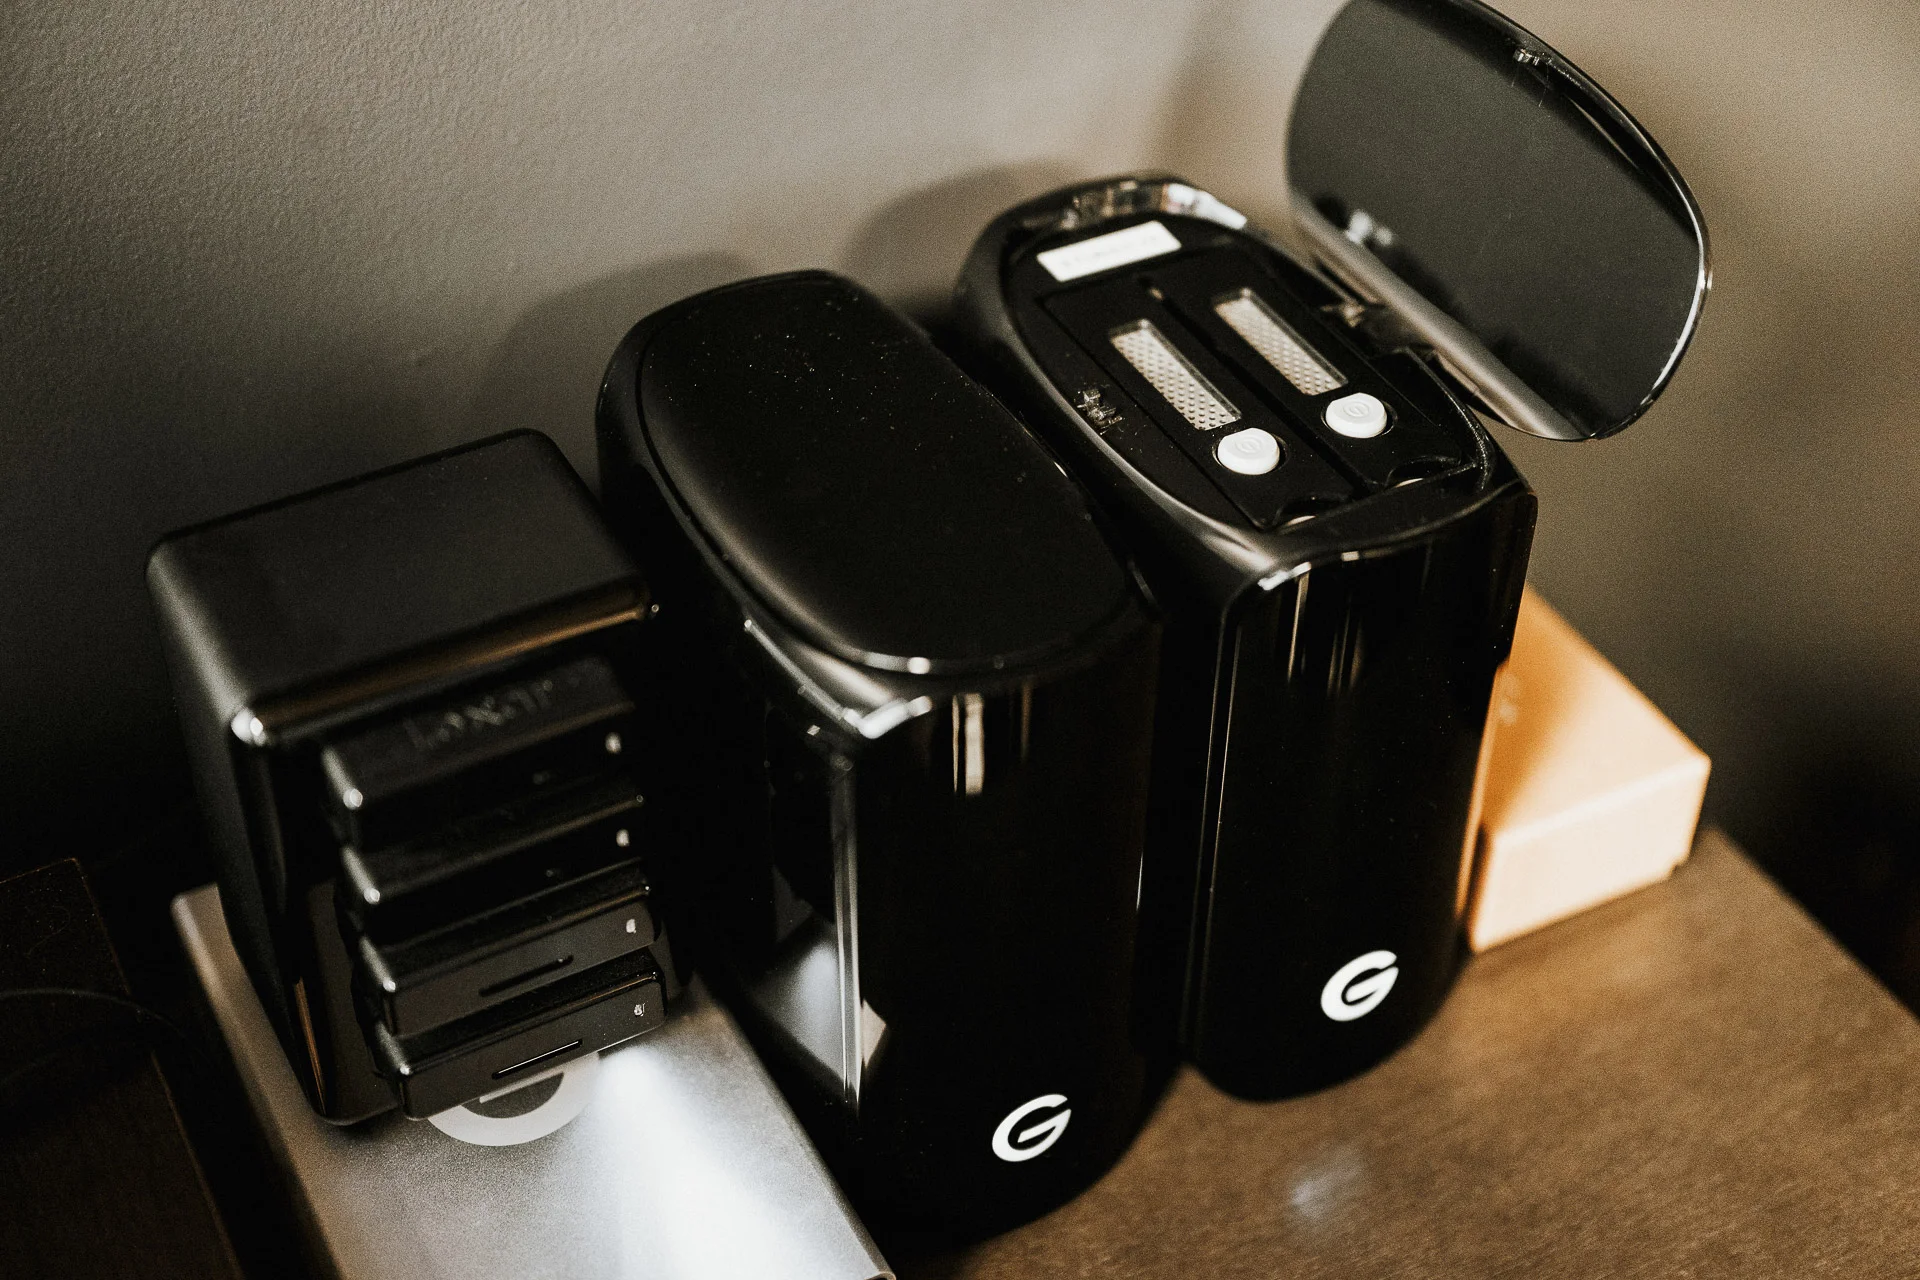
I already know what most of you are thinking, and it's a good question. How were the files being backed up prior to the new setup? I provided each of the lead photographers with a 12TB G-Studio running RAID1, which was also being backup up to cloud storage provided by Backblaze for a measly $5/month. The same setup that I wrote about for SLR Lounge, which they'll still be using going forward, but only until they are brought into the studio and transferred over to the new NAS.
Rather than just sharing my new setup (which is a little overkill for what most of you need) I'm going to explain why the Synology NAS may still be an option worth investing in. Not only that but also explain why I invested the amount of money and time that I did to get it up and running the way it is.
If you're still using a single hard drive, or even two, good luck with that. Luck is basically what you're relying heavily on. Those of you with a single dual hard drive RAID thinking that you're good to go, you're still at risk. A single RAID setup is only one layer of backup when you need at least three. You're playing with fire and to be completely honest, and blunt, you need to get your shit together before the inevitable happens. Not only for your clients, but for your own photos and memories. I know it can be confusing, but trust me, you are far from alone. If any of the terms to the right confuse you, that's completely fine. I would start by reading THIS first. Seriously, some of these are confusing to even those who claim to know this stuff. Luckily, prior to me going full-time with photography, I was a network engineer for almost 15 years and really do know this stuff.
RAID VS. NAS (The Difference)
RAID (Redundant Array of Independent Disks)
Basically, this is the term used to describe the technology that combines multiple physical disk drives (hard drives) to act as one for the purpose of redundancy. Simply put, you have two or more drives acting as one large drive which allows one or more drives to fail and no data is lost. Instead of having to manually copy something from one hard drive to another to create a 2nd copy, RAID does this automatically. For example, the most simple setup is to have two drives running RAID and they will act as one. If each is 10TB, even though you have two of them, you will only see 10TB of storage. One drive is mirroring the other. If you have an array with four internal disk drives, RAID will allow them to act as two, making an exact copy of each without you having to do a thing. They are easy to use and a lot cheaper than they used to be, but once you get to the point where you need more than 20TB (only 10TB running RAID1) things start to get a little more pricey but the good news is that storage continues to get cheaper.
When you purchase a RAID array such as a G-Technology G-RAID 2-bay array they typically come with the internal hard drives already installed. This is why I like to recommend these types of setups for those who are just getting started in building a reliable backup solution. There's nothing more to getting them up and running then plugging them in and choosing which RAID you want it to run. For those of you who haven't invested in any specific product brand yet, LaCie is an awesome alternative to the G-Tech RAID products. The LaCie 2-bay RAID arrays actually cost exactly the same and have the same great reliability and reviews.
You can also go with an empty RAID enclosure such as the one that I’m running right now, the OWC Thunderbay4. You can purchase them with the drives or you can add them yourself. A lot of times it’s much cheaper to add them yourself which is the route that I took. I bought the Thunderbay4 and added (4) 10TB Seagate Ironwolf drives. This gave me a total of 20TB that I can use, with the other 20TB as backup.
Now, there are many types of RAID, each offering a different way of handling the redundancy between the disk drives. The most simple and easiest way to get started with RAID is a dual-drive system that has the ability to run RAID1. This will allow you to have two drives that act as one, making it so that if one were to fail, the other is an identical twin so that no data is lost.

NAS (Network Attached Storage)
This is the term used to describe any type of storage, such as a RAID array of two or more disk drives, or even just a single drive that can be accessed over the network. Unlike a regular external hard drive that you plug into your workstation, a NAS can be accessed over the internet, or via a network switch so that it's accessible by multiple workstations at the same time. I purchased and installed the Synology DS1817, which is an 8-Bay NAS storage device that runs RAID. It can be accessed by myself, any other workstation at in the studio, and anyone with internet access that has been given permission.
The advantage of going with a NAS such as the Synology disk station is that you can install your own internal drives. Sure, for those of you who aren't very techy, that may sound overly complicated but it really isn't. If anything, it will allow you to save some money if you can catch a good deal on hard drives. The other popular choice for a NAS setup similar to mine, the DS1817+, is the Pegasus2 and Pegasus3 series made by Promise. The difference is that these come with their own internal proprietary hard drives already installed. Personally, I ultimately went with the Synology NAS over the Promise is because I wanted to have the ability to install my own drives.
THE NEW SETUP

I needed something with a lot more storage, room to add more, access over the internet, faster speeds, and more reliability. I already had a solid system in place but the problem was I quickly grew out of it. Last year, we shot over 120 weddings. We're looking to shoot close to 150 this year and we added two more photographers who will start shooting next year. It was time for a change and with moving into a new studio, it was perfect timing to invest in a new setup. It was time to start housing all of the studio's files in one place, here at the studio. Being that I spent 12 years as a network engineer working on routers and switches, designing this new setup was a lot like two worlds colliding. My networking knowledge helped a good amount and probably saved me money in troubleshooting, but it still turned out to be a real pain in the ass setting it up. Mainly trying to get it up and running at the speed I wanted it to, and new that it could.

Along with all the other expenses that went into completely remodeling a new studio from the ground up, building a much more complex storage network has been the one that's easily caused the most restless nights and loss of sleep. Whether you photograph 10 weddings per year or 150, losing a client's memories just one time is enough to cripple your business. I had seen and heard of too many horror stories to wait around for something to go wrong by running out of space or having one of my associate photographers run out of space.
THE LAYOUT / DESIGN

“That quickly, I have created 4 copies of the RAW files - 6 if counting both RAID drives.”
I'll go through the steps of how the network is laid out from shoot to delivery, along with the equipment used. First, let's get one thing straight. I currently don't have any affiliation with any of the equipment manufacturers used to in my studio's new network. I'm no longer affiliated with G-Tech and haven't been for a couple years now. However, I still recommend G-Tech gear and still use it in my network. All of the gear that I invested in for this new setup was done so after a ton of research and simply because I felt it was the best for my needs. I'll also give you the other options I considered so you know what else is out there.
POST SHOOT / WEDDING
The first thing I do "post-shoot" is to upload my cards as quickly as possible. I've made the mistake too many times of holding off until the next day and letting cards sit in the camera. I have a Lexar Professional card reader at home and at the studio, making it so I can upload four cards at the same time. I also have this little fella that comes in handy at home or when I'm on the road traveling - STARTECH Dual SD Card Reader.
Whether I'm at home or in the studio when uploading cards, each client gets their own folder on the network which holds their LR catalog, RAW files, edited files, etc. You can click on the image below to see an overview of this way of file organization. Basically, I've found this to be the easiest and most efficient way of using LR. It's also the best method I've found for storing RAW files, edited files, and anything else for clients to make sure I don't misplace anything. I can lose my keys while still sitting in my truck. I've lost my camera in a church while still shooting a ceremony (someone moved it but you get the point).
[ FILE ORGANIZATION OVERVIEW ]

Images are uploaded from the cards using Lightroom. I don't use Photo Mechanic like a lot of other wedding photographers, and I know this will get them all fired up. If you know how to set up LR the right way and utilize Smart Previews, it's not saving you any time. I'm sorry to be "That Guy" but hey, someone has to be.
Using Lightroom, I COPY the RAW files from each card and have them placed directly into the client's RAW folder. I also have LR create standard and smart previews during the initial upload. Once all of the cards have been uploaded, they're physically placed into an envelope and placed in a fireproof safe until the client receives their fully edited online gallery. SD cards are cheap enough now that there's no reason you can't have enough of them to cover a handful of weddings to provide that extra layer of protection.
Once the client's folder is complete, with everything that you see above, a copy gets created and placed in the new NAS (Synology DS1817+). That quickly, I have created 4 copies of the RAW files - 6 if counting both RAID drives. (1) SD cards, (2) G-RAID Studio, (3) Synology NAS, (4) Backblaze Cloud Storage. Two of the four copies are also running RAID, meaning that there is even more protection. There are mirrored drives on the G-RAID Studio as well as on the 8-Drive Synology.
UPLOADING FROM HOME
If I get home late at night from a shoot or wedding, I don't like letting my cards sit. I have a number of different reliable G-Tech and Lacie external drives at home and at the studio. When I'm at home, the initial process of creating a client folder and new Lightroom catalog is the same. This gives me a copy of the photos on the cards and on an external HD which are both placed into a fireproof safe before heading to bed. The next morning is when I head into the studio and move the client's folder onto the G-RAID Studio and Synology NAS.

FIRST LAYER - WORKING DRIVES
With a brand new 8-bay NAS, what would the reasoning be for using the two 12TB G-RAID Studios from my previous setup? As most of you know, you can only run a Lightroom Classic CC catalog on a directly connected storage device. You cannot run Lightroom on a NAS (Network Attached Storage) because it isn't recognized as a directly connected device. It’s connected via an ethernet cable which Adobe says doesn’t count. Since I create a new catalog for each and every client, I keep a copy of the catalog on the Synology and a copy that I use to edit from on my “working drive” which is the directly connected RAID storage 40TB OWC Thunderbay4 (used to be the two G-Tech enclosures in the diagram). To get even more into detail, I keep a copy of the RAW files on both as well until the client receives their online gallery. The reason for keeping two folders of RAW files has more to do with having them backed up to the cloud for much cheaper.
Confused? I'll explain why in more detail below.

The first reason is that it simply adds another layer of protection/back-up. Not only are each client's RAW files stored on the G-RAID, but also on the Synology NAS. The second reason, and biggest reason for me go with this setup, is cost. While G-Tech doesn't make the G-RAID Studio's (shown in network diagram at the top) that I purchased a few years ago anymore, THIS is what I would recommend buying today as a “working drive”. It’s an easy to setup RAID housing that allows you to install your own hard drives. You can start off with smaller drives and upgrade as time goes on and you need more storage. It’s also Thunderbolt3 which is a must today as file sizes continue to get larger and larger.
The other benefit to having a directly connected RAID device that you can store your files on in addition to a NAS is Cloud Storage. You can purchase unlimited cloud storage very cheap via Backblaze for any external devices that are directly connected to your workstation. It's a lot more expensive to back up a NAS to cloud storage since they raise the rates for anything that isn’t directly connected. How much more? Skip down to the Cloud Storage section to read more and I’ll show you.
THE SECOND LAYER - SYNOLOGY NAS
The two main storage devices in the new network are the OWC RAID and the Synology DS1817+ NAS. There are a few reasons I went with a NAS a few years ago instead of just a RAID setup. The first is that I needed a storage device that could be accessed by multiple workstations. Secondly, I wanted to have access from outside of the studio. Lastly, it had to do with allowing for growth and implementing a system that could be upgraded internally without me having to invest in another new device or a whole new setup again in another couple of years.
USER INTERFACE - WHAT A NAS LOOKS LIKE
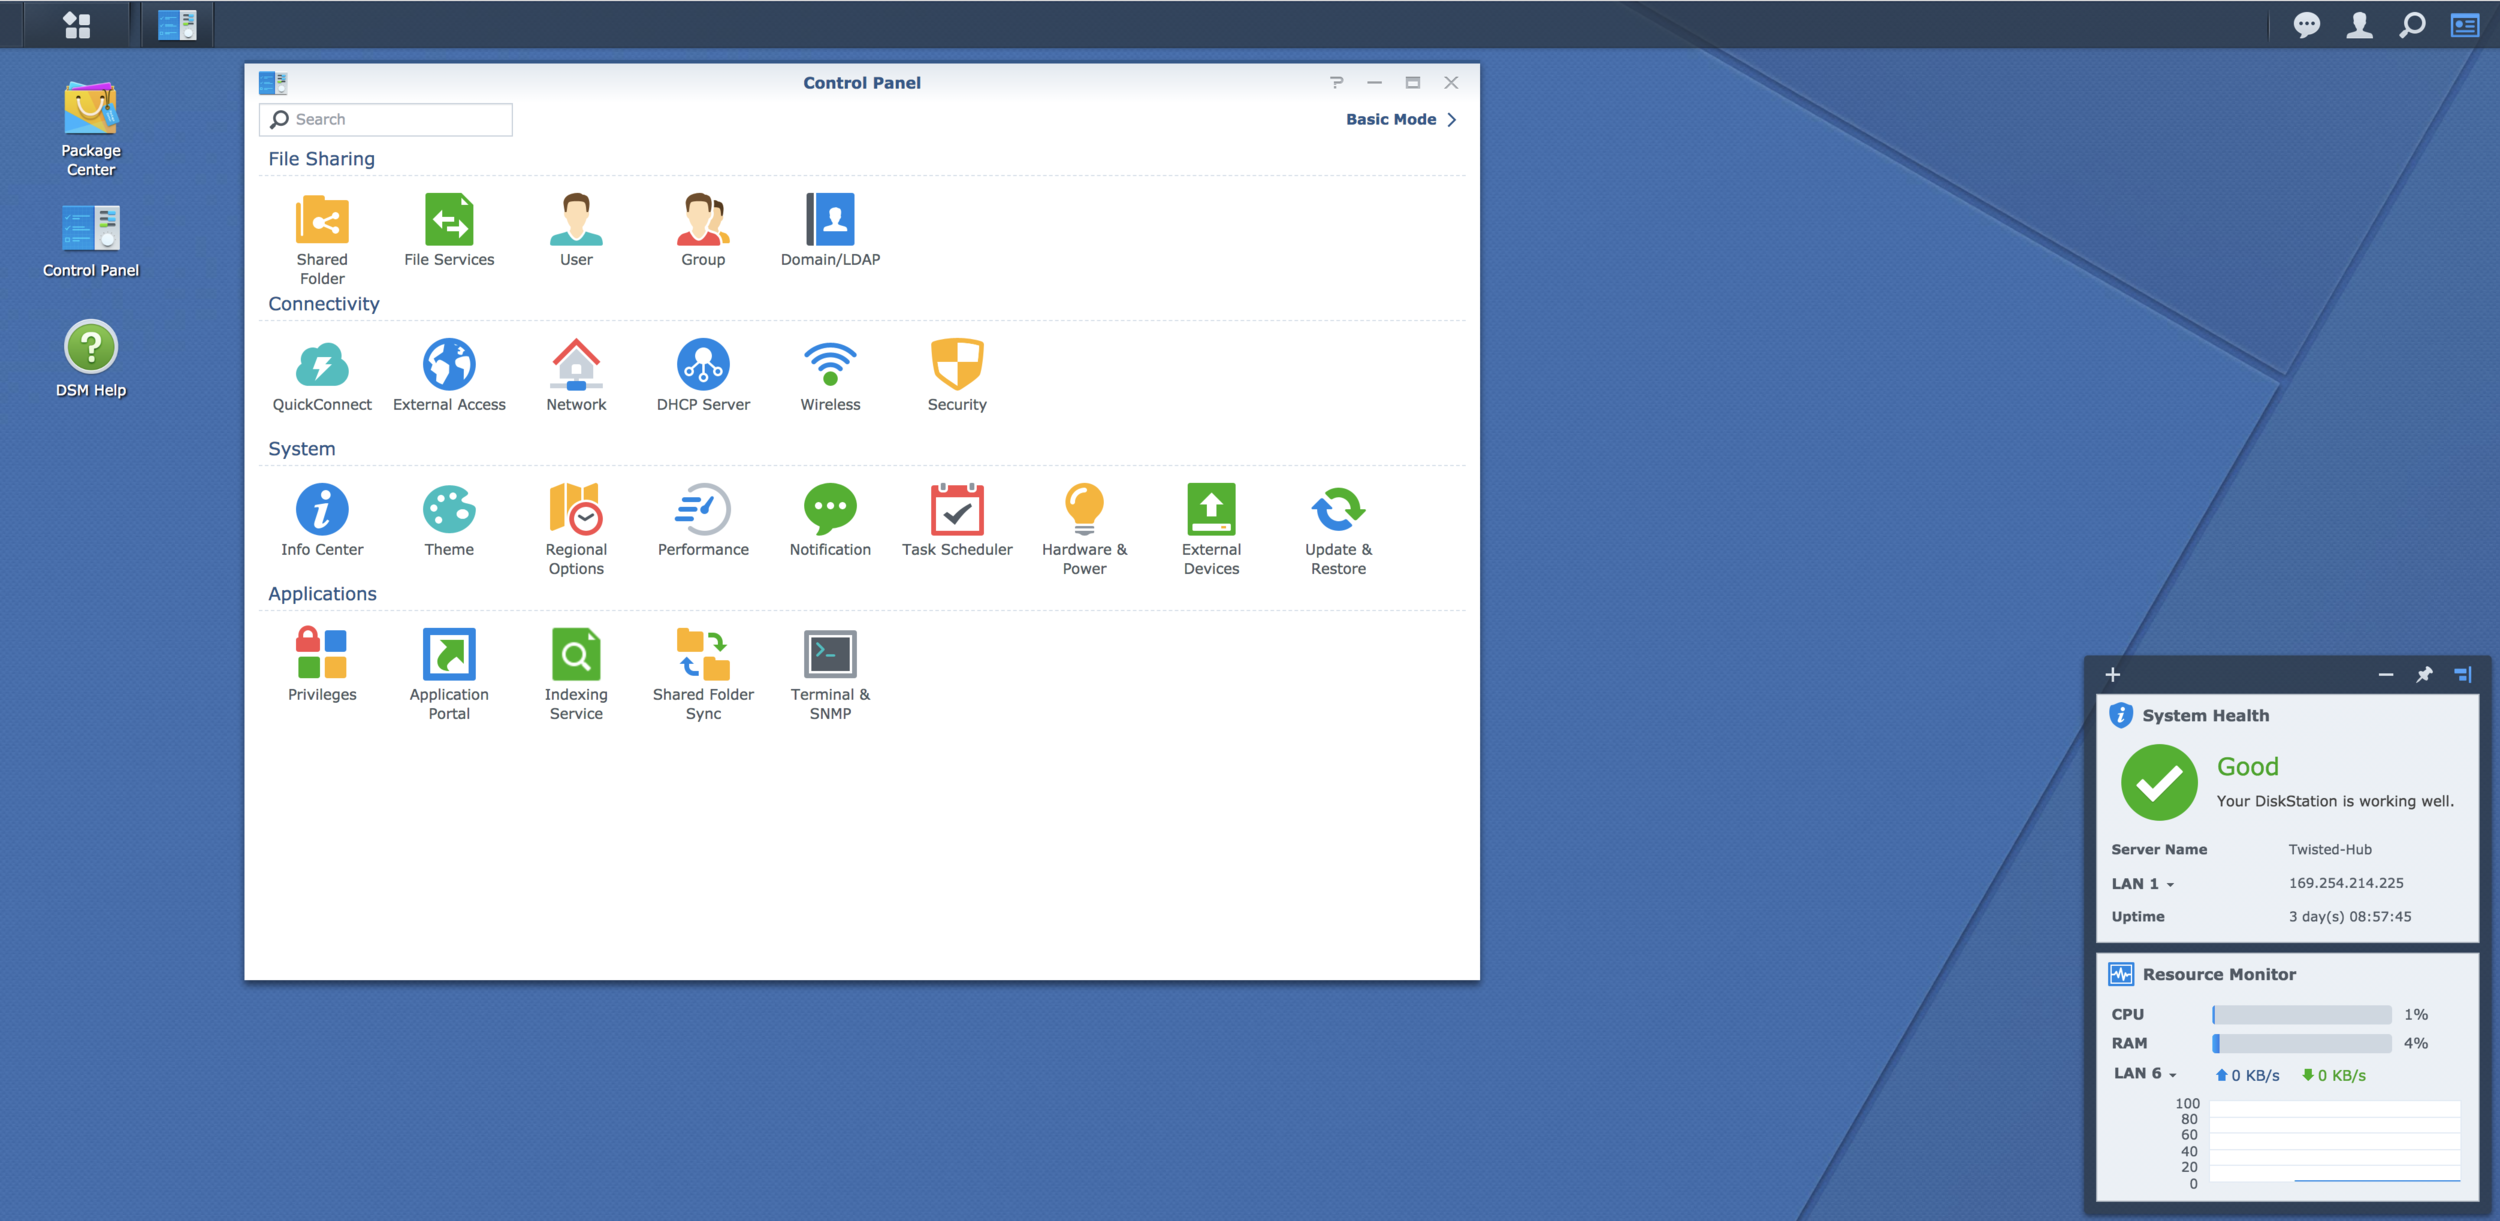
The DS1817+ is an 8-Bay disk array which has an incredibly simple web-based user interface. Click HERE to see what the Synology Diskstation Manager (DSM) looks like. It not only makes configuring it straight out of the box a lot more simple than I expected it to be but also makes it nice and easy maintaining and monitoring it. It also has its own operating system so it can also run apps.
INTERNAL HARD DRIVES (36TB Usable Storage)
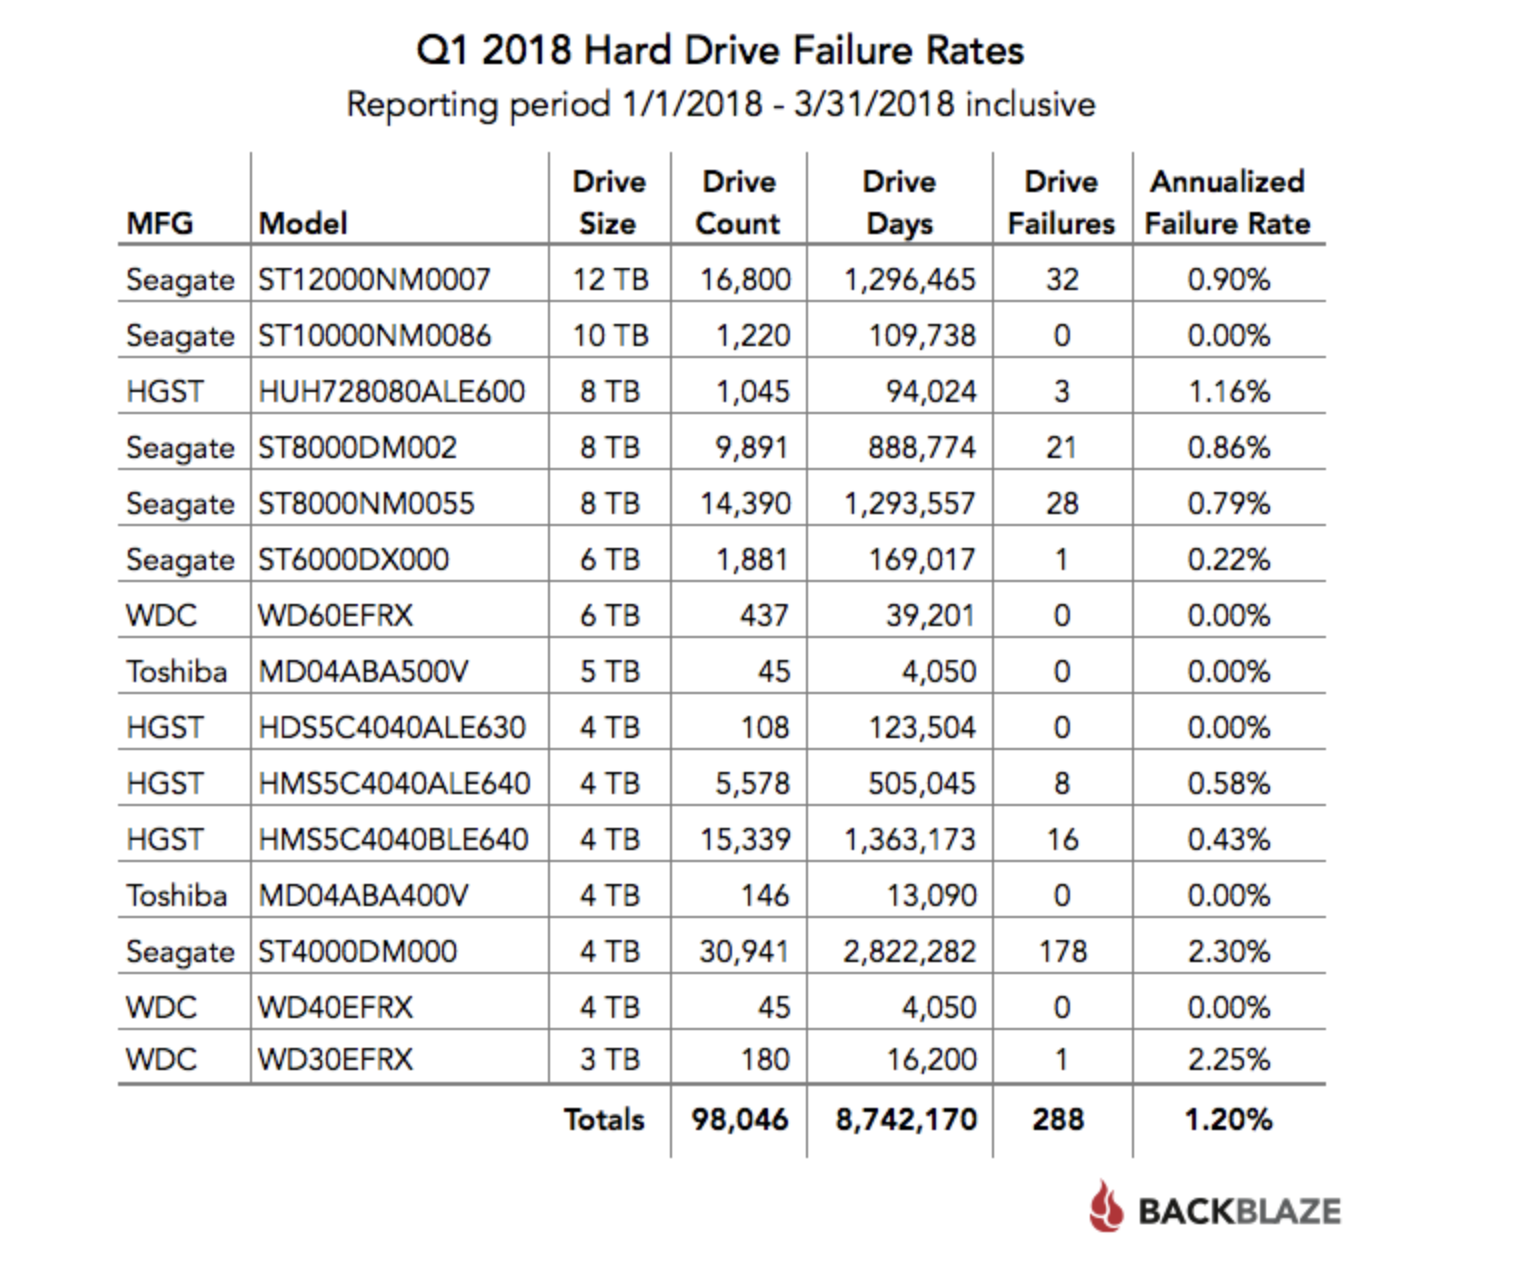
The Synology Diskstations, like the DS1817+, doesn't come with internal hard drives installed unlike most of the others. Synology provides a list of compatible HDD's and SSD's allowing you to install a wide range of different internal drives. I personally went with Western Digital RED drives, THESE to be specific. These give me a total of 48Tbs of storage, 36TB of usable storage running the Synology RAID SHR. I was also considering the Seagate IronWolf drives but just went with my gut and the recommendation of a few others, but I honestly believe either would be fine. To see the stats on Hard drives published by Backblaze click HERE.
SPEED
There are currently two models of the 8-bay Synology Diskstation, the DS1817 & DS1817+. The first is slightly cheaper, has less RAM, a slightly less powerful processor, but has the benefit of two built-in 10Gbe ports. If network speed is your main concern, the cheaper DS1817 is the way to go. I was torn on which one to purchase, and since I'm running a few apps and considering adding surveillance, I wanted the extra RAM and a more powerful processor. I also wanted the speed though, so I went with the DS1817+ which comes with the ability to add a 10Gbe card.

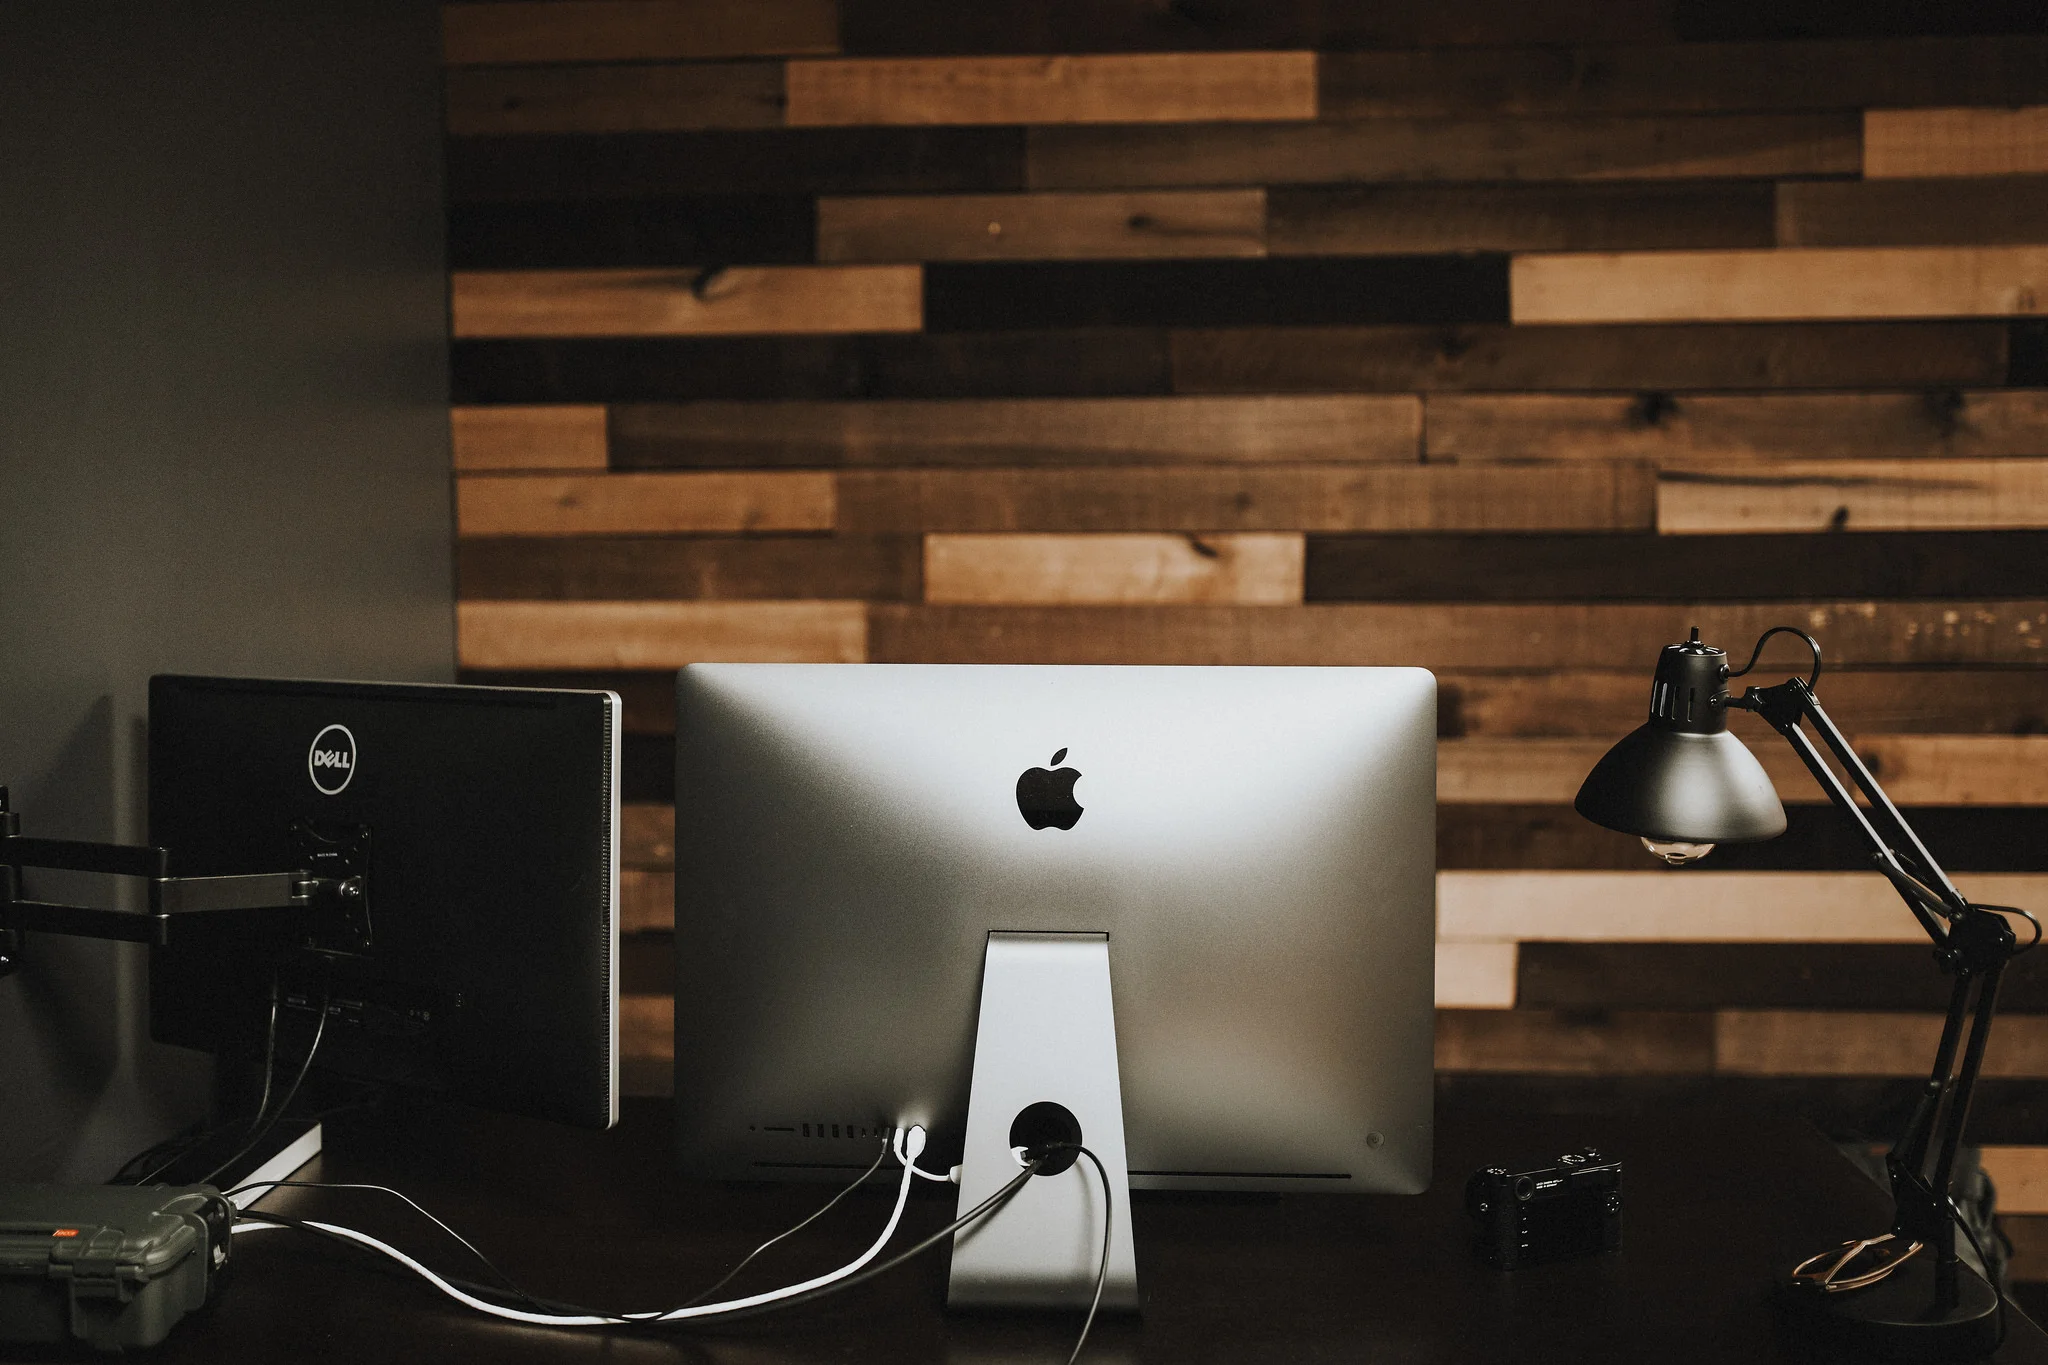
The first thing I did upon opening the NAS was to install a 10Gbe dual RJ45 card. One port is directly connected via Cat7 cable to my main workstation and the other to a wall mount for a second workstation or laptop. My main workstation is the newer 2017 iMac Pro which comes with a 10Gbe ethernet card installed so there were no upgrades needed there. Older iMacs don't have built-in 10Gbe cards, so you'll need an adaptor. As for the wall mount, I purchased an adaptor, the Sonnet Twin 10G Thunderbolt 2 to 10Gbe ethernet adaptor which you see below.


SPEED TESTS
So, how fast is 10Gbe and why would I go through all the trouble that I did getting it to run correctly? It's fast, very fast. This upgrade will myself and the save hours, if not days, of time transferring entire folders of wedding RAW files. The first speed test is to the Gigabit ethernet ports, the ones I would be using without the upgraded 10Gbe card. The 2nd is via the 10Gbe connection from my iMac Pro. The 2nd 10Gbe port which is connected to the wall mount tested the same with a few different workstations.


The DS1817, the Twisted-Hub, can be accessed by multiple workstations at the studio. It can also be accessed over the internet using an app or via FTP. This particular model allowed for a pretty nice upgrade at a very reasonable price, the addition of a 10Gbe NIC card. I installed a dual RJ45 port card which I have directly connected to my 2017 iMac Pro and the other to a wall outlet that can be accessed by anyone on the team via a 10Gbe Thunderbolt to RJ45 adapter. How fast is 10Gbe? Very fast, and quickly becoming the standard. 10 times faster than any other storage device that isn't 10Gbe capable.
COST
Here is the cost breakdown of the Synology DS1817+ exactly as I have it set up. The total comes to about $3300, $3800 with the Thunderbolt to RJ45 10Gbe adaptor. Yes, it's pricey, but this gives me more than 24TB of storage at 10Gbe speeds, plus the ability to upgrade the drives when I need to add more storage. One point that I need to make here is that you can get this setup for closer to $2500, even $2K if you don't need 48TBs worth of internal hard drives. You can install smaller hard drives, or only fill up half of the 8 bays at first. You don't have to install all 8 right away (one of the biggest benefits of installing your own hard drives). You can purchase 4TB drives and spend half the amount of what I did for drives. Installing four of the 8TB drives at first will save you over $1K up front and allow you to add more as you grow. I think you get the idea here, and even though the setup I went with cost close to $4k for this setup, you can get it for half of that if you save on drives.
DS1817+ - $949
(8) 6TB WD Red Drives - $260 x 8 = $2080
10Gbe Dual RJ45 Card - $264
10Gbe RJ45 to Thunderbolt2 adaptor - $478
CLOUD STORAGE - Backblaze

$350/year for all 7 Twisted Oaks Studio photographers - Unlimited storage for each
How does using a RAID array like the G-RAID save me money?
The answer is Cloud Storage, an absolute MUST for a solid and robust storage/backup solution. I use Backblaze, and rather than paying for their NAS Cloud Storage which they charge per TB of storage, I'm able to keep my current plan of $5/month for unlimited storage. Backblaze charges $5/month for unlimited storage of directly connected devices. So, any hard drives that you have directly connected to your workstation can be part of this $5/month plan. This includes RAID arrays such as the G-RAID Studios.
I also pay to have our associate photographers added to the plan (see above) so that there can be a layer of cloud storage at their home. This comes out to paying $350/year for myself and my five associate photographers. The charge for Backblaze's C2 NAS storage ends up being close to $3k per year for over 20TB's of storage.

No longer talking about paying for unlimited storage, Cloud Storage for the NAS is per TB of storage.
CONCLUSION
A lot of times photographers can forget how quickly disaster can strike. We like to believe that hard drives are fail-safe, little armored cars that will last forever. Until they don't. There are way too many of you reading this that don't have more than two copies of your files and are simply playing with fire. I posted the link to the Failure Rate Report by Backblaze above, below is a screenshot of their 1st QTR report that shows 288 failures. That is just in the 1st QTR alone! We save up our hard earned money for the newest camera gear but far too often forget about putting some of that money towards storage. I was the same way until I heard horror stories of what happens to a business when a client's photos are lost. I made the decision a few years ago that I wasn't going to risk that and invested in the setup I wrote about for SLR Lounge HERE. This new setup cost me close to $4k which is a lot more than most of you need to spend. It's also a lot cheaper than other larger studios have spent, especially for those offering video as well. With more than 120 weddings per year for Twisted Oaks Studio, $4k is a drop in the hat for peace of mind. Yes, I sleep a lot better knowing that I made this investment and am set up for the next few years.
The reality is that Hard drives fail and sadly, photographers typically don't invest in a more robust backup plan until they realize this fact the hard way. I see a lot of photographers who have two external hard drives and they manually back one up to the other. This works until you forget to back something up and a drive crashes. Your files are gone. There are others who think they are stepping things up by purchasing a RAID, like the G-Tech or LaCie RAID arrays mentioned above. That's a good start, but that only counts as one layer of protection. There's always the possibility of the entire RAID enclosure failing, causing both drives in the array to crash. This isn't common, but can it happen? Absolutely.
I took the time to write this article to help those who, like myself, don't want to wait until disaster strikes to invest in a solid backup/storage solution. It's also to help anyone who was in my shoes a couple months ago and need a larger setup that allows for more growth. This breaks down my new design as detailed as possible while also attempting to help anyone who is confused on whether a NAS is an option they should entertain. Please don't hesitate to comment with questions or shoot me an email.
LIST OF EQUIPMENT
OWC - Other World Computing
OWC Thunderbay4 (my current RAID setup)
G-Technology Setup
G-Technology RAID (The current model)
G-Technology RUGGED 1TB External Drive
Synology Setup
Synology DS1817+ 8-Bay NAS Enclosure
10Gbe Network Card with RJ45 Connectors
Card Readers
Lexar Professional 4-Bay Thunderbolt 2 Card Reader
Ethernet Switch
Cameras
Adaptors
DISCLAIMER: All links in this article are B&H Photo affiliate links, none are for the actual companies that manufacture any of the storage products that I use or mention in this article. There is absolutely no reason for me to suggest any piece of storage device over another for personal gain.
UPDATES
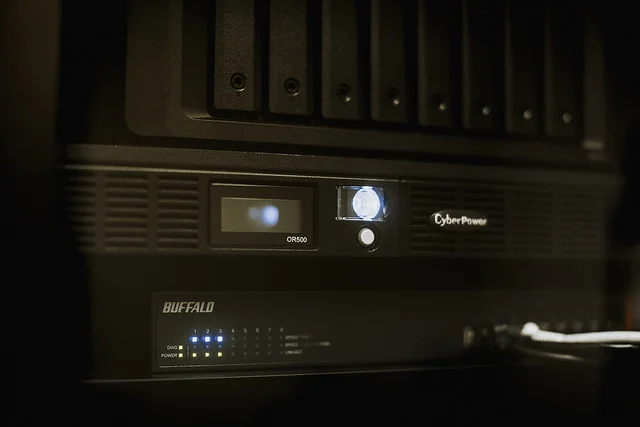
10/25/2018: At the time of writing this article, I placed a disclaimer at the beginning stating that even though there was a 10G ethernet switch shown in the network diagram I hadn’t yet added one. Since the 10G network card in the Synology was dual port, I simply ran direct connections from two workstations. This is a recommended setup by Synology, but I ran into issues that simply weren’t making any sense while troubleshooting. Since two workstations were directly connected to the 10G port on the Synology, and I had a direct ethernet connection from my Comcast gateway/modem for external access via wifi, no matter how I set things up the wifi connection (which is slower than the 10G connection) was always preferred. The only way that I could get the full speeds available by the 10G card were to disconnect the wifi. Setting the service order on the Synology and workstations made no difference. I spent weeks working with Synology and other network techs that I am friends with since it made absolutely no sense to me, I decided to add in the ethernet switch thinking that it might resolve the issue. Well, it did. Luckily, for me, and for anyone else looking to invest in a similar setup there is a cheaper option now for a 10G switch made by Buffalo. Adding the new Buffalo BS-MP20 8-Port 10Gbe switch was the missing piece to making this setup run smoothly as it should have all along, and it only cost me $500.