Aurora Camera Care - Sensor Cleaning Kit Review
The Focus Pyramid
Back in 2014, about 3 years after purchasing my first DSLR (Nikon D60), I purchased my first full-frame camera, the Nikon D700. This was right around the time that the bokeh bug bit me. All I wanted to shoot were f/1.4 primes and the aperture rarely left that wide open position. Most of you know what I’m talking about, a good amount of portrait photographers go through the same phase. Some are going through it right now.
Luckily, I broke that habit and learned how to use my lenses more creatively. However, going through that phase taught me a very valuable lesson. It taught me the importance of making sure my lenses are calibrated to each of my cameras. Shooting wide open does look great, I still do it a lot today. The problem is, if you aren't nailing the focus, no amount of bokeh can save the shot. When shooting with such a shallow DOF and using auto-focus, it can become pretty frustrating if your images aren't sharp. I quickly learned how to calibrate my lenses.

I still find it surprising how many photographers don't calibrate their lenses. Whether they don't even know there's even such a thing, or they simply are too nervous to attempt it on their own, fearing they will mess something up. It's honestly impossible to make a mistake and mess anything up that can't be fixed with a little help from a call to another photographer who knows what they're doing. The tools you need are also very cheap. Back in 2015, I wrote an article for SLR Lounge that laid out the very easy to follow step by step instructions on how to go about calibrating your lenses to each of your DSLR cameras. I also gave a cheap alternative to the pricier calibration kits that were on the market at the time and worked great: The Focus Pyramid, which can be found here: FOCUS PYRAMID.
Click on the image of the focus pyramid above to read the SLR Lounge article on how to calibrate your lenses on your DSLR. If you aren’t already doing so, it’s a must and there’s simply no way around it. It doesn’t matter if you just bought a brand new lens or not, that DOES NOT mean that it’s calibrated. Most aren’t, and that’s because each and every camera is different. I wouldn’t shoot with brand new lens on any job without taking 10-15 minutes to calibrate it first. It’s very rare that a lens is spot on, so when you’re shooting wide open at f/1.4 your images are more than likely not as sharp as they should be.
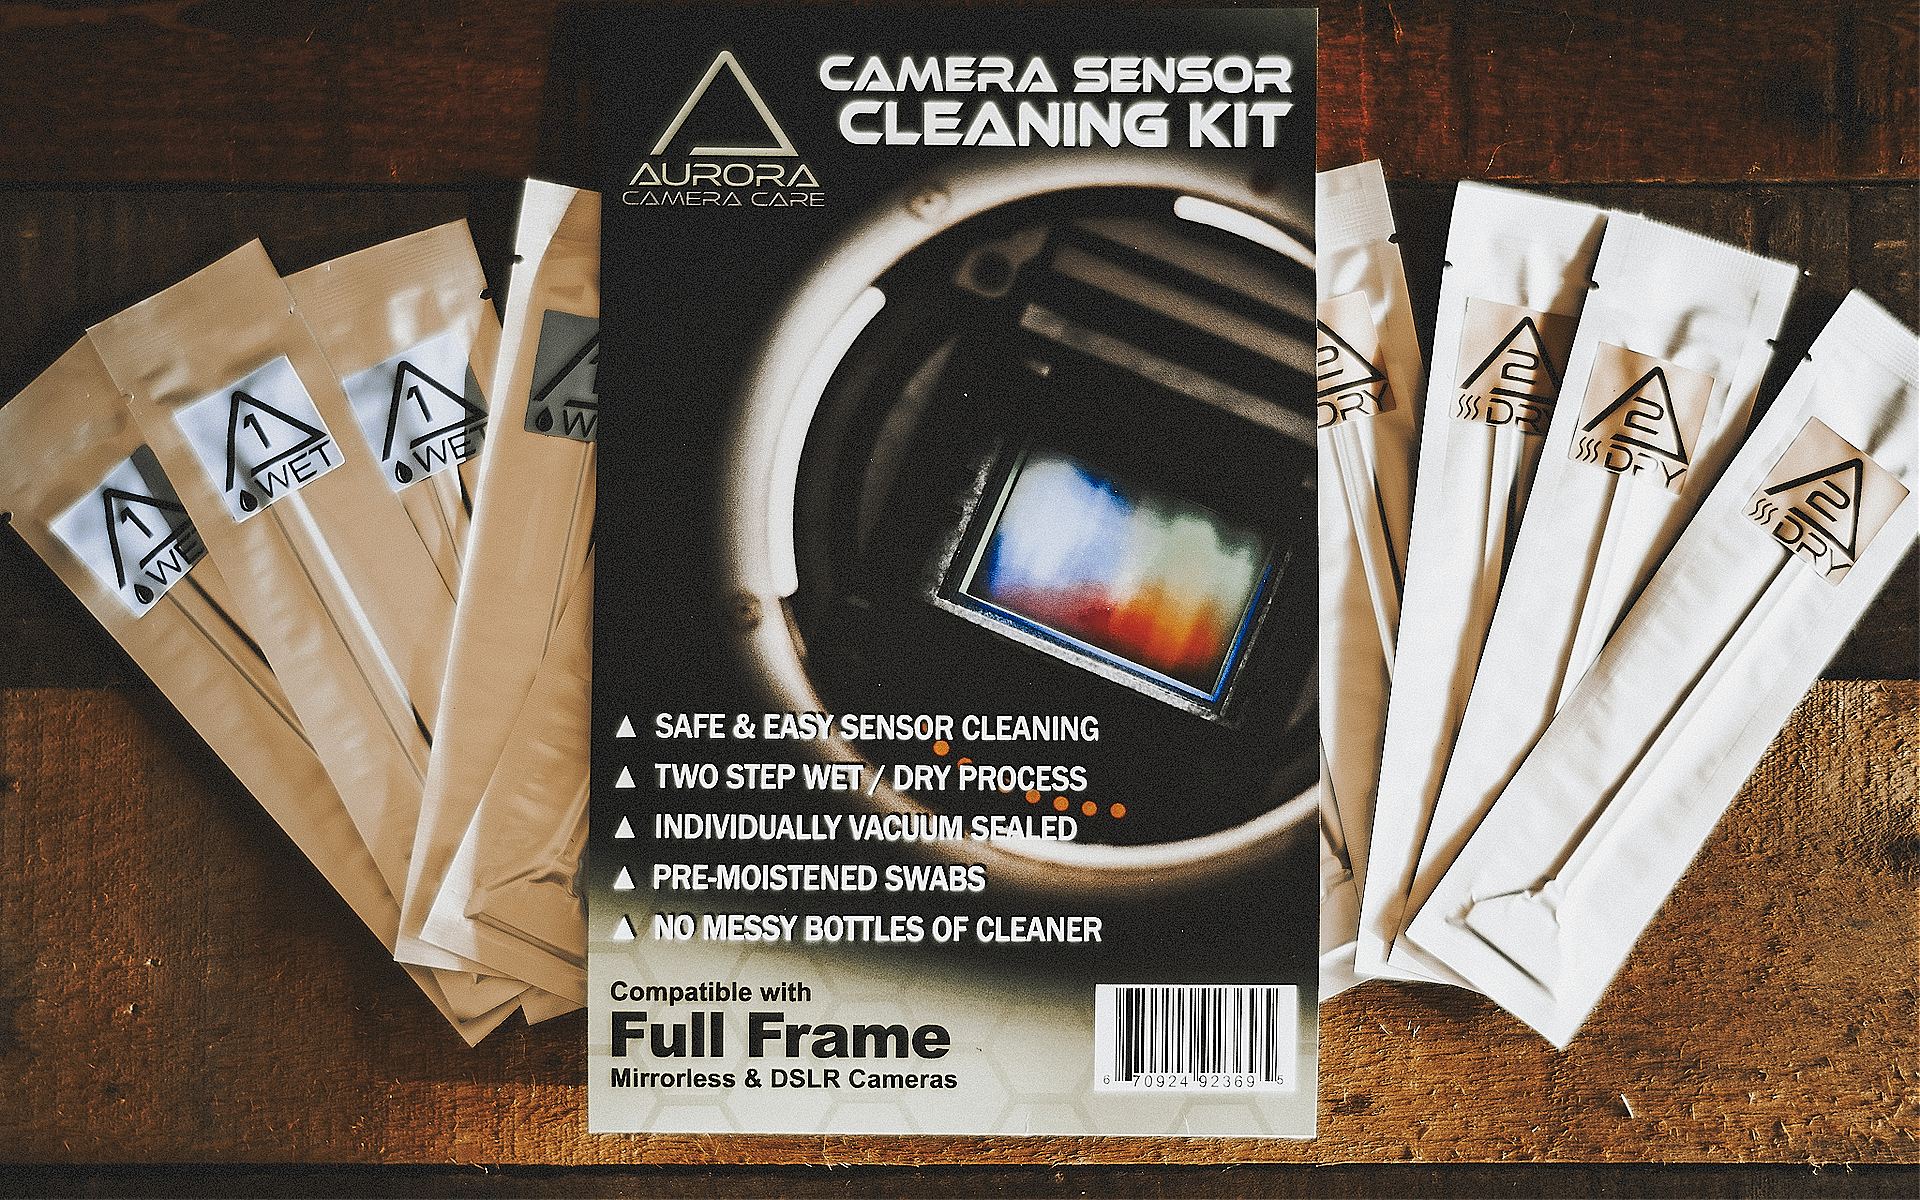
Aurora Camera Care Sensor Cleaning Kit
Shortly after posting that article on SLR Lounge, the designer and owner of the Focus Pyramid, Joseph Cristina, reached out to say how much he appreciated me using his product and even more so writing the article. Over the years, I’ve stayed in touch with him and just about a couple months ago, he reached out to tell me about a new product. A product that typically scares photographers even more so than a calibrating kit. Even some of the most experienced photographers I know wouldn’t want anything to do with this product and for one simple reason, it involved touching your camera’s sensor.
Just the slightest whisper of this procedure can leave photographers feeling lightheaded and nauseous. For some odd reason. I’ve been cleaning my own sensors for as far back as I can remember. Why? Well, once I started shooting at higher apertures, I was able to see all the little dust spots that were from my dirty sensor. Once I found out the cost and wait time to get a sensor cleaned I decided to learn how to do it myself. It was either that or get a lot quicker with the spot healing tool in Lightroom.
The most popular product at the time was made by the company VisibleDust. They made a number of different tools to clean camera sensors. One of which was a spinning paint brush looking tool called the ARCTIC BUTTERFLY. The Arctic Butterfly? With a name like that what could go wrong?
Well, when I used the Arctic Spinning Bat Mobile, it touched the side of the sensor compartment and picked up some grease. Grease that would then be transferred onto my D700’s sensor. YES, Perfect! Exactly what I wanted to see. Not only did my sensor still have the dirt and dust, but it now had a grease smudge across it.
After tossing the spinning paint brush (which I have listed below) into the trash, I ordered the next product from Visible Dust, the “EZ Sensor Cleaning Kit". It says EZ right in the product name, how tough could this be right? This kit came with a few dry swabs on sticks and some small vials of liquid cleaning to apply to the swabs. The kit also came with swabs that were for drying. This was a huge pain in the ass. I had to be careful not to put too much cleaning liquid on the swabs and no matter how many times I used the drying swabs, there always seamed to be streaks left on the sensor that I couldn’t quite get off. I called Visible Dust and was told that I may have gotten oil on the sensor and would need to order a different solution. After placing a new order and waiting for it to arrive, I gave it a try and was able to finally get the sensor clean. Great, that would be the last time I used that product.
The next day, I threw all of the swabs and liquids into the trash. It was too much of a headache, let alone the added bonus of a brand new grease smudge that I had to figure out how to clean off. I would rather send my cameras out to get serviced then deal with this kind of nightmare again.

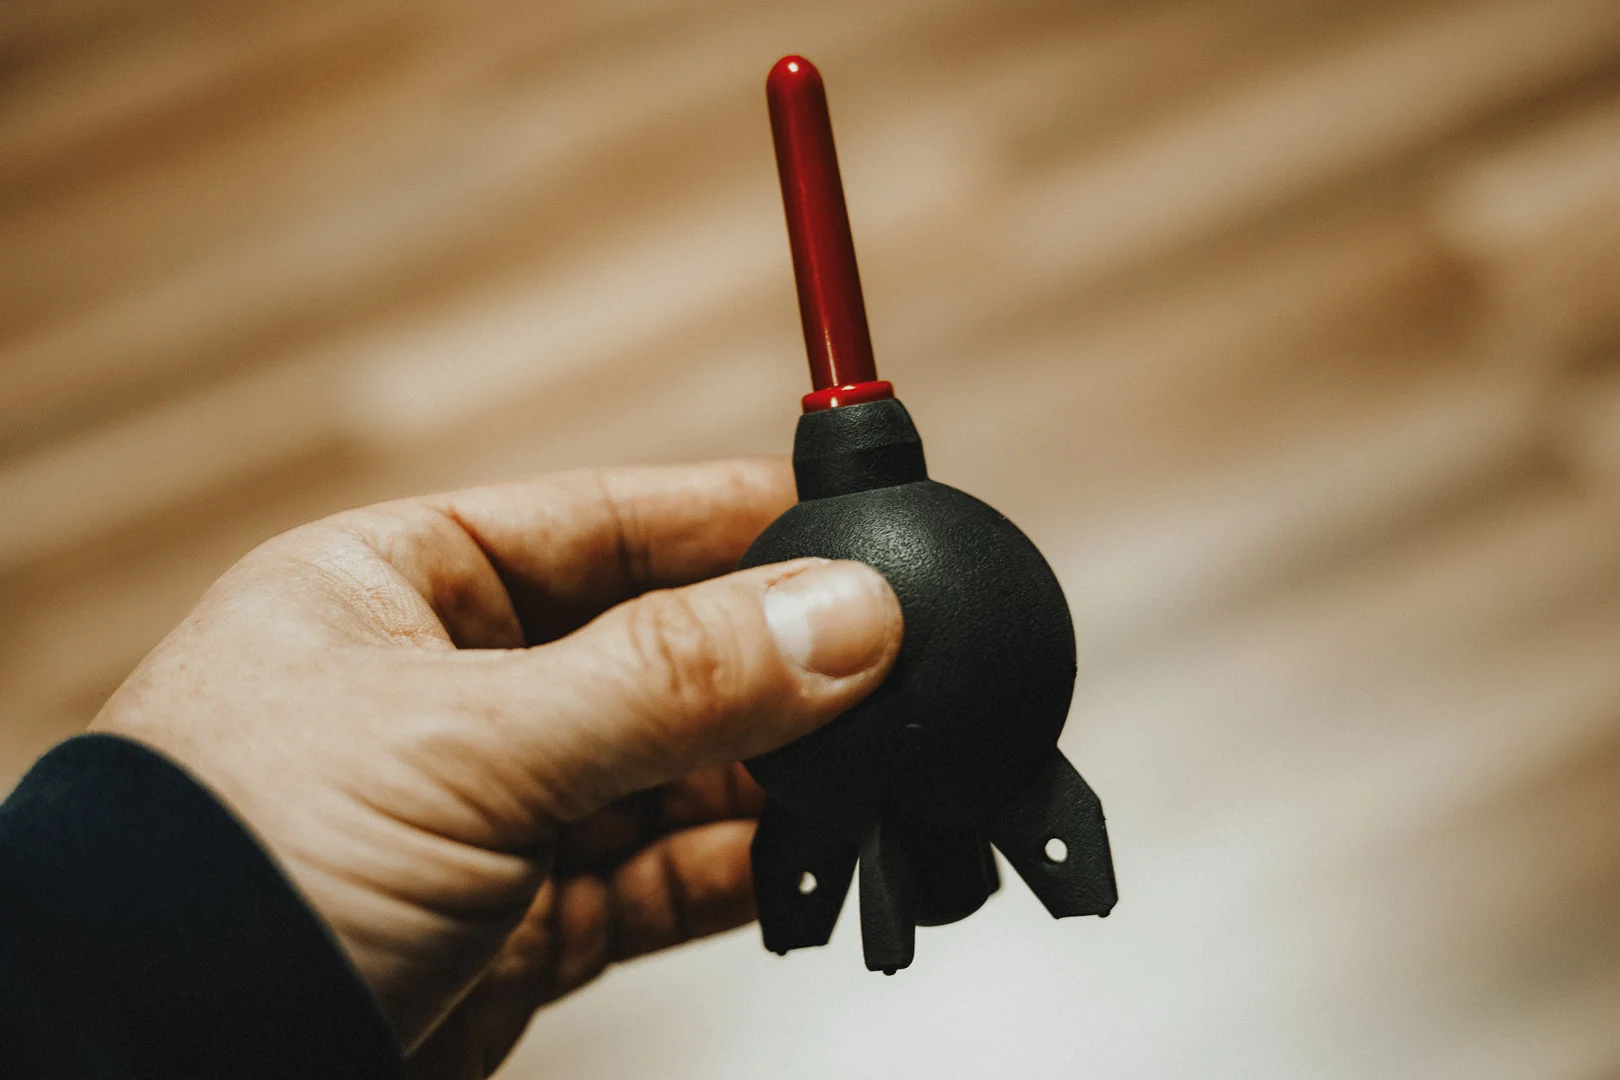
If you’re looking for the easiest way to quickly rid your sensor of any dust that may be sitting on it, the Rocket Blaster does an excellent job. Especially, if it’s just dust on the sensor, which in most cases, that’s really all it is. The Rocket Blaster can easily blow the dust right off the sensor and you’re good to go. I use it at least once every couple weeks, just to make sure there’s nothing just sitting on top of my sensor that will leave spots on my photos when my aperture is stopped down to anything over f/8.
Giotto Rocket Blaster
THE NEW ACC SENSOR CLEANING KIT
When Joseph Cristina reached out to me about his newly designed sensor swabs, I told him straight up that I’ve tried a number of different ones and none were easy to use. He basically asked me to please give his product a shot and sent me a free pack to test out. As a disclaimer, I’ve been using a sensor cleaning gel stick over the past couple years. While it’s not perfect, it does do a much better job than any wet/dry swab I’ve ever tried and I told Joseph this. I received the packets in the mail and right before I left for my Savannah Workshop I decided to give them a try. I could have tried them on my wife’s Canon 5D MarkIV cameras but instead used my $6k Leica SL to test out the new sensor cleaning kit.
Once I opened the individual swab packs, I immediately knew these were a great design. Not only are they sized to match the sensor, but there’s no vial of liquid to make a mess with. These swabs were lubricated with just the right amount of liquid. No more than necessary, no less. I was a little hesitant being that it was the first time using this product, but I knew Joseph long enough to know that he wouldn’t be shipping me a bad product. I was right, he didn’t.


Anytime I clean my sensor, I pull up this YouTube channel which plays a white screen: https://www.youtube.com/watch?v=8lgfq3LX34g.
I set the lens to manual focus and focus to infinity, set the aperture to f22 and take a photo. This will allow me to see whatever sensor dust is on the sensor. Now I know what the “before” photo of the sensor looks like so I can start the cleaning process.
My Thoughts
The ACC Sensor Cleaning Kit was very easy to use, and I was able to open the packs without any trouble. After applying the wet swab and swiping across the entire sensor to clean off any artifacts, I immediately applied the dry swab to soak up any remaining residue. The dry swab didn’t quite dry the sensor completely. It came close, but if you watch the video carefully you’ll be able to see the streaks that are still there after making two passes. I gave it a few more minutes in the hopes that the residue would dry and it did on its own. I re-attached the lens to take a quick test shot of the white screen and everything looked great. No streaks, no dirt or dust, and any artifacts there from the first shot were completely cleaned and off the sensor.
The Images below shows the dust/dirt that was there on the sensor before I cleaned it. Not too bad actually considering how much I’ve shot with this body over the past few months. I’ve seen them a hell of a lot worse than this, so this was good news! The third shot on the bottom is the one that I took after cleaning the sensor with the ACC sensor cleaning kit.
Once I took the test shot above, it was clear to see that the sensor was pretty clean and all the spots had been removed. Nice and clean again! While I do still like the gel stick, especially for my Leica camera bodies being that Leica recommends the gel stick as a sensor cleaning tool, these ACC sensor cleaning swabs do an overall better job of actually cleaning the sensor. These were the first wet/dry swabs that I felt actually worked really good and didn’t make a mess or when comparing them to my previous attempts with similar products, make things worse. Going forward, I’ll be using both. The gel stick for a quick clean and the ACC swabs once every couple months to get things really clean and back to looking brand new.
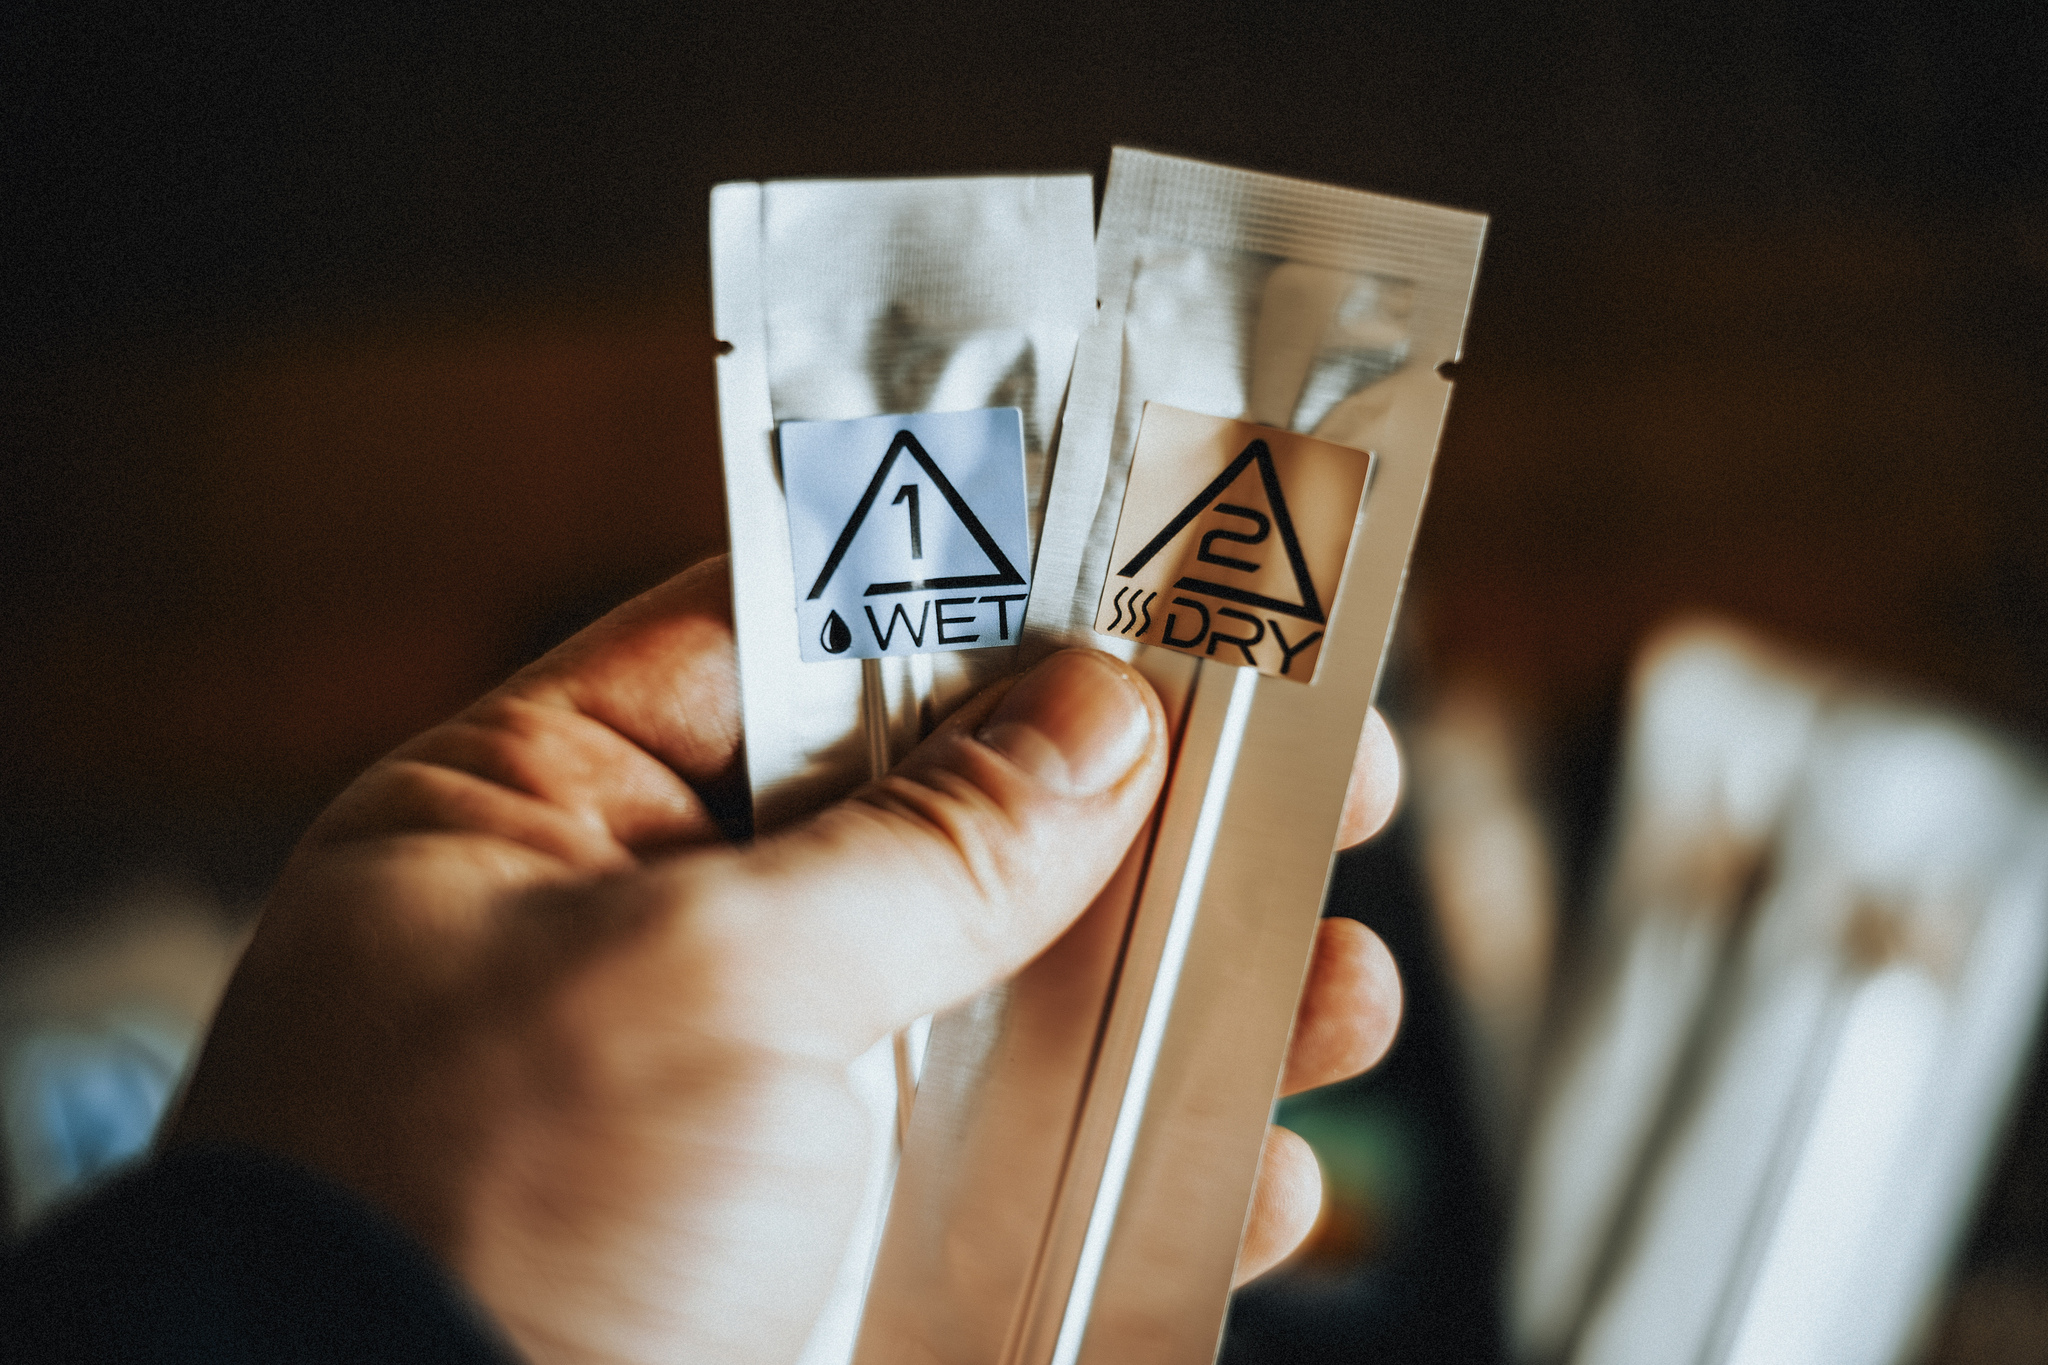
My one and only critique has to do with the wet and dry swabs looking exactly the same once they are out of their pouches. They are labeled with different colors on the individual packages, but as you can see below, once they are opened they look identical. As I was cleaning my sensor, I made two swipes with the wet swab, followed by two passes with with the dry swab. I gave it a few minutes to see if it would dry on it’s own and since there were still slight streaks I wanted to very gently run the dry swab over the sensor one or two more times. As I reached for the dry swab, I had to really look closely to see which was which. I would really like to see them make the wet and dry swab handles a different color, the dry having a tan handle to match its packaging and the wet swab to match its blue packaging.

Wet swab is on the left, Dry is on the right.
Whether you have a full-frame sensor, cropped sensor (APS-C), or Micro Four Thirds, there is a separate kit designed specifically for each sensor size. To visit the store and purchase one of the sensor cleaning kits, please click HERE!